
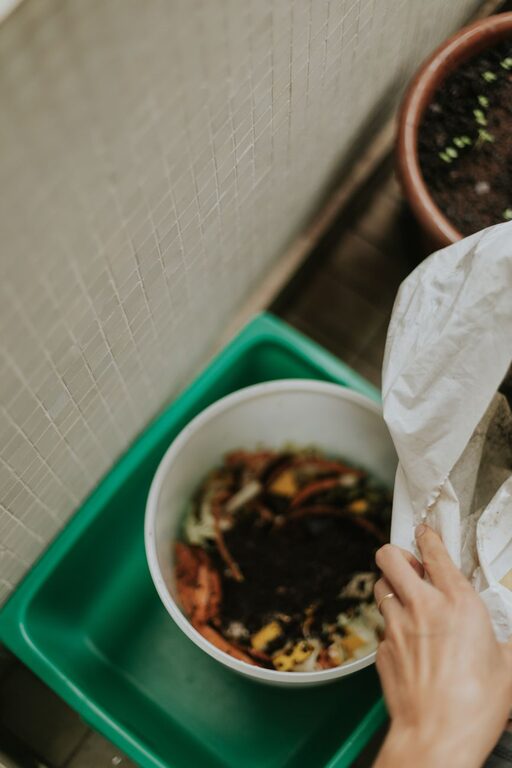
Composting is a simple way to turn everyday food scraps and yard waste into a useful soil amendment. Instead of sending organic material to the trash, you can let it break down naturally and use the finished compost in gardens, flower beds, containers, or around trees.
Starting a compost pile does not require much space, money, or experience. With the right materials and a little regular care, you can create a healthy compost system at home.
Choose the Right Composting Method
Before collecting scraps, decide which type of composting setup best fits your home and available space.
Outdoor compost bin
An outdoor bin is a good choice if you have a yard. You can purchase a ready-made bin or build a simple enclosure from untreated wood or wire mesh. Place it on bare soil when possible so helpful organisms, such as earthworms and microorganisms, can move into the pile.
Choose a location that is:
– Easy to reach throughout the year
– Partly shaded
– Protected from strong winds
– Close enough to the kitchen or garden for convenience
– Away from areas where water collects
Tumbler
A compost tumbler is a sealed container that rotates on a stand. It is often easier to turn than a pile and may help keep the area tidy. Tumblers usually work best when filled with a balanced mix of materials rather than small amounts added randomly.
Indoor or small-space composting
People without a yard can consider a countertop collection container, a worm bin, or a small indoor composting system. A countertop container does not create finished compost by itself, but it can hold scraps until they are moved to a community compost site or outdoor bin.
Check local guidelines before choosing a method, especially if you live in an apartment or shared building.
Learn the Two Main Material Groups
Successful composting depends on combining different types of organic material. The two basic groups are often called “greens” and “browns.”
Greens
Greens are generally moist materials that provide nitrogen. Examples include:
– Fruit and vegetable scraps
– Coffee grounds and paper coffee filters
– Fresh grass clippings
– Fresh plant trimmings
– Tea leaves and unbleached tea bags
– Crushed eggshells
Browns
Browns are usually dry materials that provide carbon and help create air pockets. Examples include:
– Dry leaves
– Small twigs
– Shredded plain cardboard
– Uncoated paper
– Straw
– Untreated wood chips
A simple approach is to add roughly two or three parts browns for every one part greens by volume. This ratio does not need to be exact. If the pile smells bad or looks wet, add more browns. If it is dry and barely changing, add more greens and a little water.
Start With a Good Base
Begin your outdoor pile with a layer of coarse brown material, such as small branches, dry leaves, or straw. This helps air move through the bottom of the pile and reduces the chance of water collecting there.
Add alternating layers of greens and browns. You do not need to create perfectly even layers, but avoid adding a large amount of one material at once. For example, a thick layer of grass clippings can become compacted and develop an unpleasant smell. Mix it with dry leaves or shredded cardboard instead.
A pile that is at least three feet wide, deep, and tall often retains heat better than a very small pile. However, even a smaller bin can produce compost if it receives the right mix and enough air.
Keep the Pile Moist but Not Soaked
Moisture helps organic materials break down, but too much water can remove air from the pile. Aim for the dampness of a wrung-out sponge.
If the pile is too dry:
– Add a small amount of water while mixing
– Add fresh fruit and vegetable scraps
– Cover the pile during very dry weather
If the pile is too wet:
– Add dry leaves, shredded cardboard, or straw
– Turn the materials to improve airflow
– Make sure rainwater can drain away
Avoid soaking the pile all at once. Adding water gradually makes it easier to maintain the right balance.
Turn the Compost Regularly
Turning mixes the materials, introduces oxygen, and helps prevent compacted areas. Use a garden fork or compost aerator to move material from the outside toward the center.
For a new pile, turning once every week or two is a useful starting point. You can turn it more often if the pile is wet or has a noticeable odor. A properly balanced pile may need less attention over time.
Do not worry if your compost does not heat up right away. A small pile, cool weather, or a lack of nitrogen-rich materials can slow the process. Regular mixing and balanced additions usually help.
Know What to Add and What to Avoid
Many common kitchen and yard materials are suitable for a home compost pile.
Good choices include:
– Vegetable and fruit scraps
– Eggshells
– Coffee grounds
– Dry leaves
– Small amounts of plain paper and cardboard
– Grass clippings mixed with dry materials
– Noninvasive plant trimmings
Avoid adding materials that can attract pests, create strong odors, or introduce unwanted chemicals. These commonly include:
– Meat, fish, and bones
– Dairy products
– Greasy or oily foods
– Pet waste
– Diseased plants
– Weeds with mature seeds
– Glossy or heavily coated paper
– Coal or charcoal ash
– Treated wood
Some composting systems are specifically designed to handle materials that should not go into a regular backyard pile. Follow the instructions for your chosen system and check local composting rules.
Manage Food Scraps Without Creating Odors
If your compost bin is far from the kitchen, keep a small container indoors for collecting scraps. An open container can be emptied frequently, while a container with a lid may help reduce odors.
To keep the collection container fresh:
– Empty it regularly
– Rinse it after use
– Add a layer of shredded paper or dry leaves
– Avoid storing wet scraps for long periods
– Keep it away from direct sunlight
You can also freeze food scraps until you are ready to add them to the compost pile. Freezing helps reduce odors and makes some materials easier to break down.
Watch for Common Problems
Compost problems are usually easy to correct.
Bad smell
A strong rotten smell often means the pile is too wet or lacks oxygen. Add dry browns and turn the pile thoroughly.
Slow decomposition
A pile may break down slowly if it is too dry, too small, or made mostly of browns. Add a few greens, moisten it lightly, and mix the contents.
Flies or pests
Cover fresh food scraps with a layer of browns. Avoid meat, dairy, oily food, and other materials that attract animals. A secure lid can provide additional protection.
Slimy material
Slimy compost is usually too wet or compacted. Mix in dry leaves or shredded cardboard and turn the pile to restore airflow.
Know When Compost Is Ready
Finished compost is dark brown, crumbly, and earthy-smelling. You may still see a few small pieces of twigs or leaves, but most of the original materials should no longer be recognizable.
Depending on the materials, weather, and care, compost may take several months to finish. Letting it mature for a little longer can improve its texture.
Use finished compost by:
– Mixing it into garden soil
– Adding a thin layer around plants
– Blending it into potting mixes
– Spreading it over lawns or planting beds
– Adding it to raised garden beds
Avoid using unfinished compost around delicate plants because it may compete with them for nutrients as it continues to break down.
Start Small and Stay Consistent
The best composting system is one you can maintain easily. Begin with a manageable bin, learn how different materials behave, and make small adjustments as needed. Composting does not have to be perfect to be useful.
By balancing greens and browns, maintaining moisture, and providing airflow, you can turn household organic waste into a valuable resource for your home garden.
